

Evil Eyes are often given to protect a home, new business a person from the ill meanings of others or the Evil Eye itself. They can be found throughout many cultures especially in the Mediterranean and West Asia and are also given as a protection or good luck charms. you can make yours for your home, new business or as a gift for someone else.
Alternatively if you don’t like the symbolism of the Evil Eye you could make yours as a symbol for your own Third Eye chakra, choosing crystals to support your intuition, like, Lapis Lazuli, Labradorite, Sodalite, Blue Kyanite and Azurite.
Firstly, it is your creation and you can interpret making this in any way you want with any materials you want to use or have to hand.
The Selenite palm stone could be swapped for a Quartz coaster and you could make a round Evil Eye. It’s up to you. You could also just use card.
You could use buttons or flat backed beads for the pupil of they eye.
You could swap out crushed crystals for glitter, crushed coloured german glass glitter or Swarovski crystals.
I have used the following crystals as I want to invoke the vibrational qualities of the crystals into the Evil Eye.
- Selenite to amplify the qualities of the other crystals and program the evil eye with the intention of divine protection.
- Turquoise has long been used an amulet or good luck charm, it also embodies balance and harmony, courage and success.
- Sodalite for clarity.
- Jet for protection and to draw out negative energy.
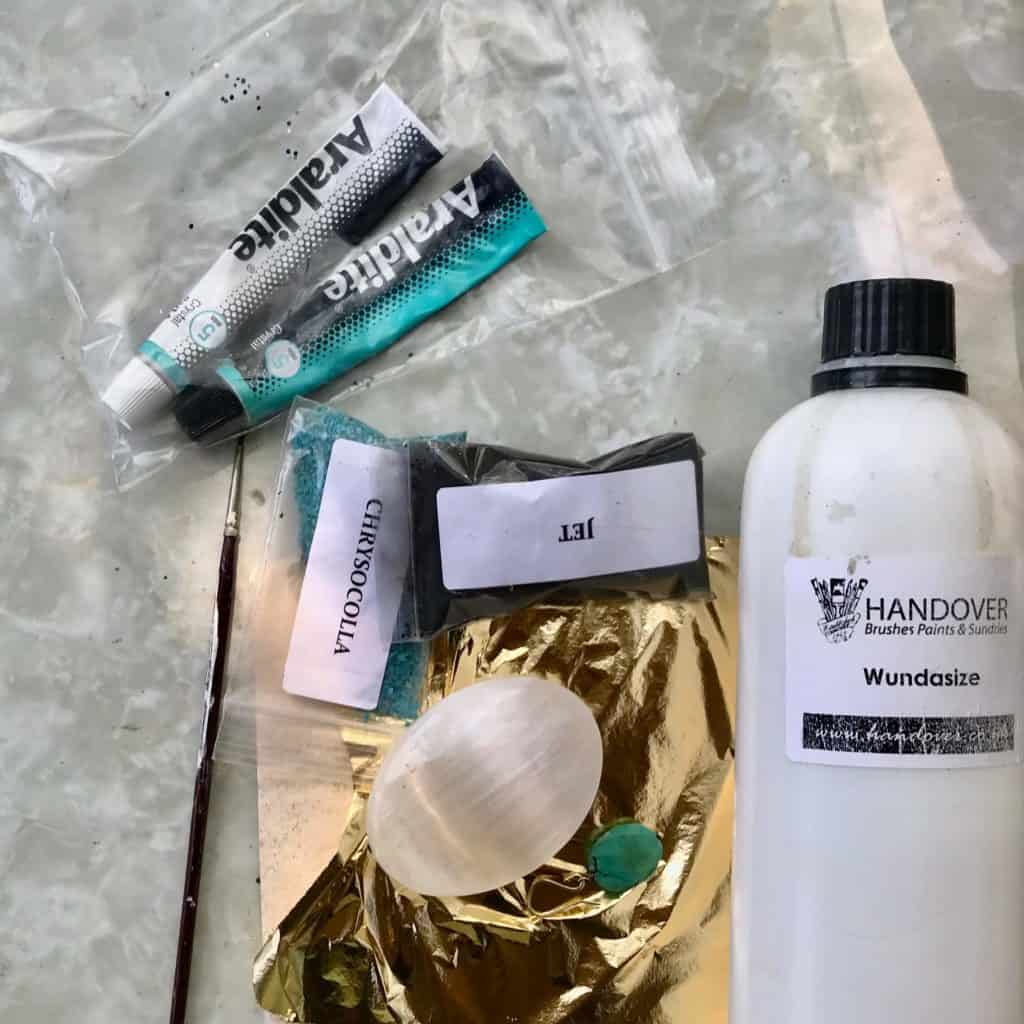
If you want to make one like this then you will need the following;
- Selenite palm stone
- 1 x Oval or round Turquoise/blue cabochon.
- Wundasize or other gold leaf size
- Gold leaf, or imitation gold leaf (varnish if using imitation gold leaf to prevent oxidation)
- GemTac glue or PVA if using glitter.
- Araldite Glue or other two-part epoxy resin glue
- A fine tipped paint brush
- Crushed crystals in black and blue. I used Jet (fine grade) and Sodalite ( medium grade). I buy mine from Right Rocks on Esty, see the link below in resources.
- Cocktail sticks
- A flat edge craft tool or small flat bead screwdriver.
- Gold or silver marker pen
- Cotton ear bud sticks
- A dry paint brush to buff the gold leaf
- Newspaper to work on
- Piece of card to mix glue on
- Small brass D-ring so you can hang it up (optional)
- Masking tape or Cellotape
- Spray varnish
Make time – 2 hours +
Step 1
Begin by mixing a small amount of your two-part expoxy glue, stir with a cocktail stick as per manufacturers instructions. I leave mine to set a little, so it is thick and worn slide off the palm stone surface.
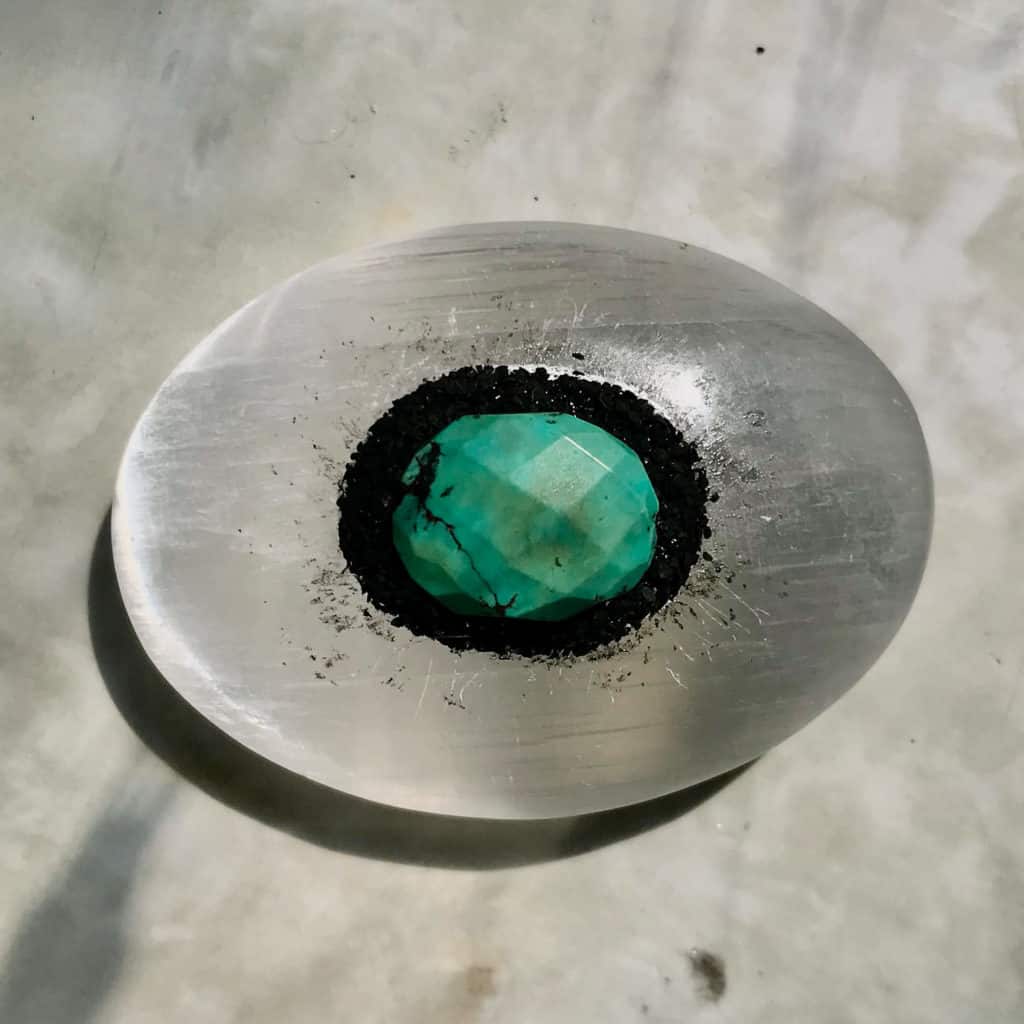
Place a small amount of glue on the back of the turquoise cabochon and place in the centre of your palm stone. You could also just use a black circular cabochon and build out the blues from there, its up to you.
Hold in place until the glue sets, don’t apply too much pressure or it will slip on the surface of the selenite. Then apply GemTac glue around the cabochon to make a ring of Jet crystal, it’s quite a thick glue so it is easy to apply. Sprinkle the Jet crystal onto the glue and press lightly with your finger. Tip the spare crystal off the and then use the craft tool or screwdriver to more the crystals into a neat ring around the turquoise cabochon. See the image below for guidance.
Step 2
Think about how wide you want your next ring of crystals, I used Sodalite (Medium Grade). Put a small amount of GemTac around the black crystals your previously applied. If you go wrong wipe any excess with a damp piece of kitchen towel.
Next sprinkle your crushed blue stone over the glue and dab lightly with your finer so that they set into the glue. Wipe any bits of glue away.
TIP – I place my stones that I am working on, on a piece of paper so I can collect any spare pieces of crystal and put them back into the bag. Leave to dry fro about 15 mins.
Step 3
In the mean time, start thinking about how you want your outer blue stones to appear, do you want keep making more circles alternating in colour? There is no set plan. If it helps. take your maker pen and draw your design onto the plan stone.
TIP – Draw your design fist on a piece of paper, draw around your palmstone so you have the approximate correct surface size to plan on.
Step 4
Once you are happy with your design use the marker to draw it onto the stone and then fill it in with glue. Then gently sprinkle your crystals over the glue, again lightly pressing them into place with your finger.
TIP – I lightly crush about a teaspoon of the crystals and add them to the bag before I apply them to the stone. This then gives you smaller pieces and powder that then fills in the little gaps. Leave for about 5 minutes then turn upside down so any loos crystal can fall off.
Step 5
Use your craft tool (or small screwdriver) to neaten the edges by gently pushing the crystals onto your design lines. I then built mine up by putting small amounts of glue onto of each layer of crystals to fill in the gaps or to make a more solid layer of crystals. Wipe away any remaining glue with damp kitchen towel or cotton bud.
Step 6
Once you are happy with your final circle of crystals make sure the surface of the selenite is clean and then think about your design for the gold leaf if you chose to use it. Wundersize is a great uncomplicated product that is easily applied. Take your fine tipped paint brush and dip it into the size and paint it onto the selenite in your chosen design. When first applied it is milky white in colour, this will then turn clear once it is dried. When it is clear you apply the gold leaf.

Step 7
Gold leaf can be quite tricky to use. I cut mine into small pieces that roughly match the shape I am covering then apply by gently draping it over the size. Take the dry brush and gently press the gold leaf on to the glue. As you press in the leaf you will notice it begin to become smooth. Do this all over and leave for about 5 minutes and then take your dry brush and gently brush off the excess leaf that doesn’t stick in small circular motions.
TIP – If you have never used gold leaf before, you can find tutorials online to help you. Alternatively skip this and go for glitter or colour it in with a gold marker pen.
Step 8
Now it’s time to place the “pupil “ in the centre of your cabochon. I used crushed jet crystals, you could use any other crushed black crystal OR you could use a black flat back circular cabochon of any kind. Use the GemTac to do this. Once dry spray your creation with varnish, especially if you are using fake gold leaf, glass glitter or gold/silver marker. Read the manufacturers instructions regarding how to apply.
TIP – Spray very lightly and not too close to the object. It’s better to apply two light coats than one thick coat as the varnish will run off the sides and case drip lines. So a quick light burst of varnish is best.
Step 9
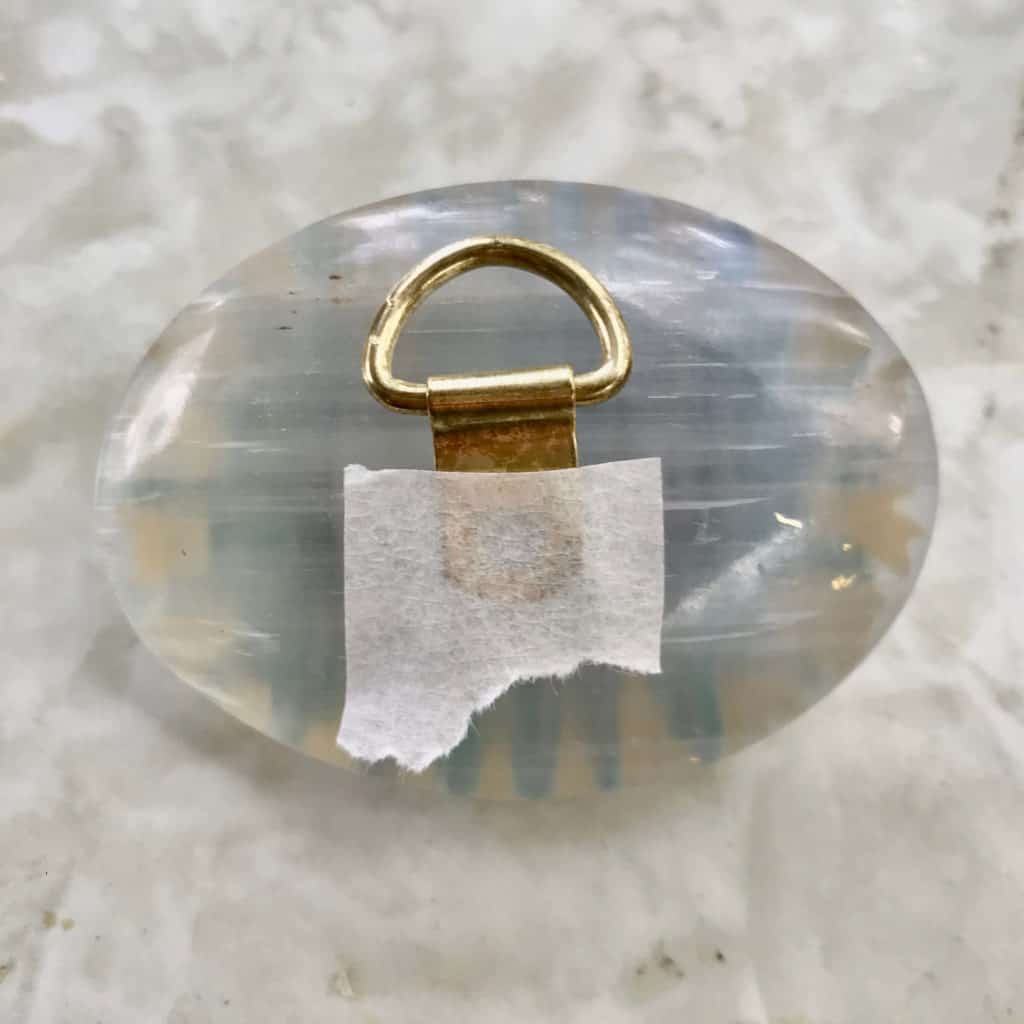
Finally, if you want to hang this up you need to fix your small D-ring to the back. Mix a small amount of the Araldite on a pice of card wait for it to become sticky and thick (usually after about 30 seconds) and then put it on the back of the D-ring tab. Put this in the centre on the back of you palm stone and take a small piece of tape to hold it in place if needed. Leave to set for upto 24 hours. It is then ready to hang up. You can also skip this stage and just place it on your altar if you have one.
Resources
GemTac https://www.amazon.co.uk/s?k=gemtac&ref=nb_sb_noss_2
WundasIze https://www.handover.co.uk/handover-wundasize-acrylic-gold-size-1-litre
Crushed Crystals https://www.etsy.com/uk/shop/RightRocks?ref=search_shop_redirect
Quartz coasters https://www.etsy.com/uk/search?q=quartz%20coasters
Selenite Palm Stone https://www.etsy.com/uk/search?q=selenite%20palm%20stone